Previous Topic

Next Topic

Book Contents

Book Index

Generating Custom Reports

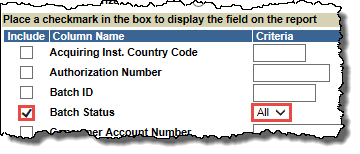
The Custom Report Generator in Authorization & Capture enables you to define the parameters for generating reports. To generate a custom report:

  1. From the Reports menu, click Custom Reports.

    a_and_c_custom_reports

    The Custom Reports page opens.

    ac_report_generator

  2. Click Custom Reports Generator.

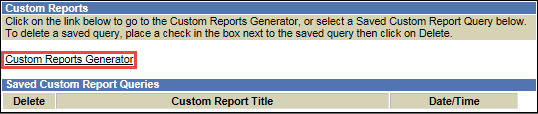
    The Custom Reports Generator page opens.

    ac-rpt-generator_page

  3. Enter a Start Date (this is mandatory) and, if required, an End Date (in mm/dd/yyyy format), or in each case click the calendar icon 
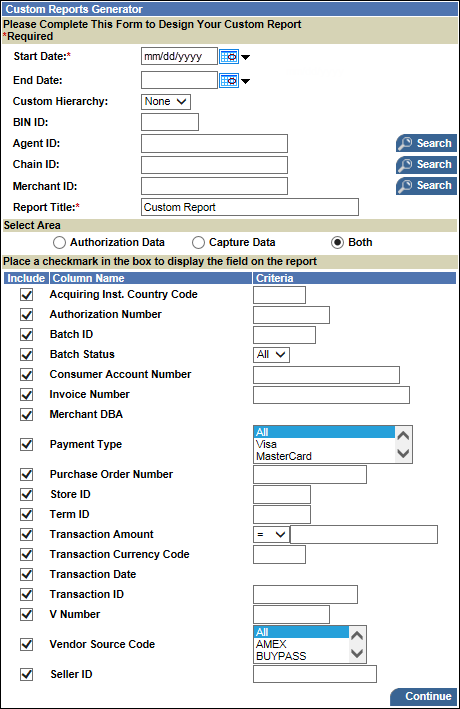
and then select a date from the pop-up calendar.
  4. To generate a report based on a custom hierarchy (if available), from the Custom Hierarchy drop-down list, click the required hierarchy name.

    ac_custom_h_box

  5. In the fields provided, select the BIN and type the Agent ID, Chain ID, or Merchant ID on which to query.
  6. In the Report Title field, type a title. If you do not specify a unique report title, it is called Custom Report by default.
  7. In the Select Area panel, select the option for the type of data to report on:

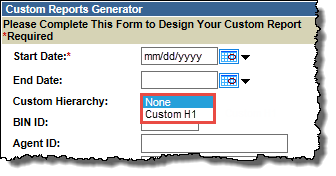
    The fields for reporting (in the lower half of the frame) change to reflect your selection.

    Note: If you select Authorization Data or Both, you can report a 7-day time frame. Additionally, you can report on captured batch data up to 31 days.

  8. For each Column Name you want included in your report, make sure the Include check box is selected, and then enter or select any Criteria as required.

    ac_custom_rpt_fields

  9. Click Continue.

    The Sort Options page opens.

    Sort Options

  10. Select the Primary Sort (or accept the default), and as required, the Secondary Sort and Tertiary Sort criteria for your report, and select the Ascending or Descending option for each criteria as required.

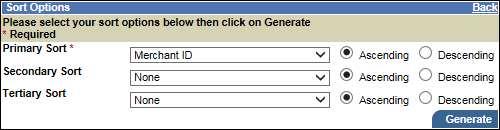
    Note: The sort options available depend on the Column Names you selected.

  11. Click Generate.

    The page for your report opens, once the report has run.

  12. As required, 
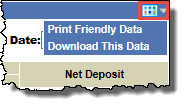
download or print the data.