- From the e-Connections Portal Administration menu, select User Admin.
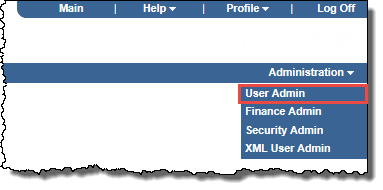
The User Administration page opens.
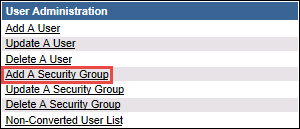
- Select Add A Security Group.
The Add a Security Group page opens.

- Select I want to create a new Security Group, and then select Continue.
The Add A Security Group - General Information page opens.
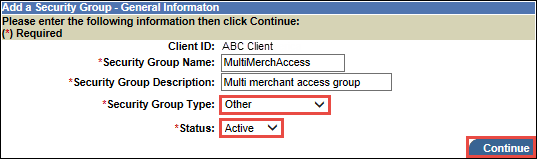
- Enter information in the fields as follows:
- Security Group Name: Enter the security group's name.
- Security Group Description: Enter the security group's description.
- Security Group Type: Select Other.
- Status: Select Active.
- Select Continue.
The Add a Security Group - Access Level page opens.
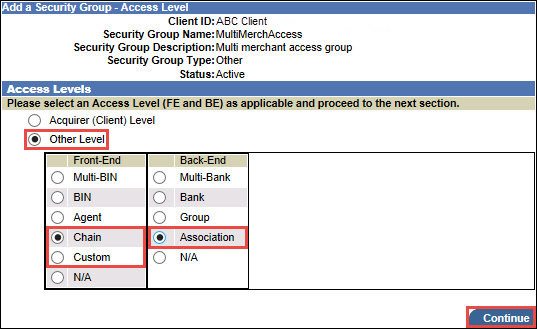
- In the Access Levels panel, select Other Level.
The panel expands to list the Other Level options.
- From the Front-End options list, select Chain or Custom, as required.
- From the Back-End options list, select Association.
The Add a Security Group - Functions page opens.
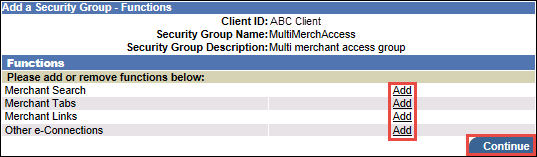
- In the Functions panel, for each function you want to add to the security group, select Add, to open the associated page, select the options you require for that function, and then select Continue.
- Once you have added all the functions you want for the security group, select Continue.
The Add a Security Group - Themes page opens.
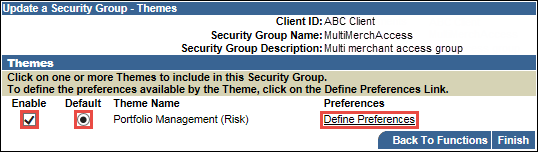
- Select Enable for the themes you want, and select the Default theme, for the security group.
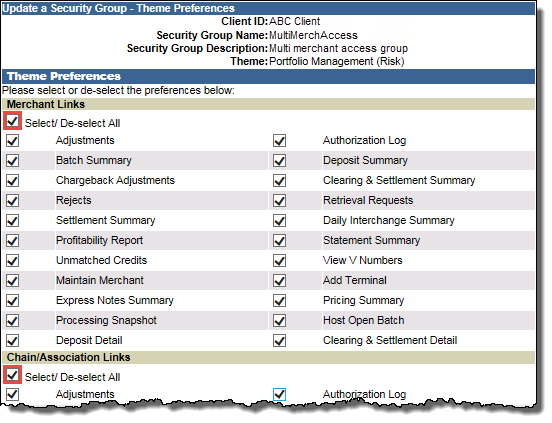
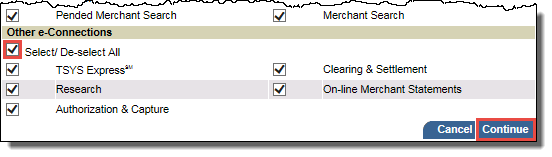
- For each theme you have enabled, select Define Preferences to open the Update a Security Group - Theme Preferences page, then make sure the check boxes for all the preferences are selected, and then select Continue.
The Add a Security Group - Themes page opens again.
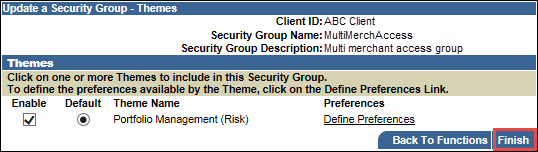
- Select Finish.