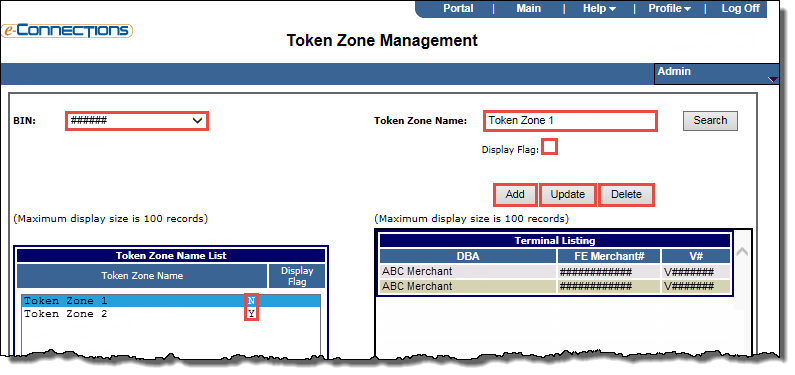
Open the Token Zone Management page and select the BIN for the token zone you want to add.
Depending on your user privileges, you can manage token zones on the Token Zone Management page:
From the Admin menu, click Token Zone Management.
The Token Zone Management page opens.
From the BIN drop-down list, select the BIN for the token zone you want to add, update, or delete.
The page refreshes so that:
Any existing token zones for the selected BIN are listed in the Token Zone Name List, with Y or N indicating whether the corresponding token zone has the Display Flag selected.
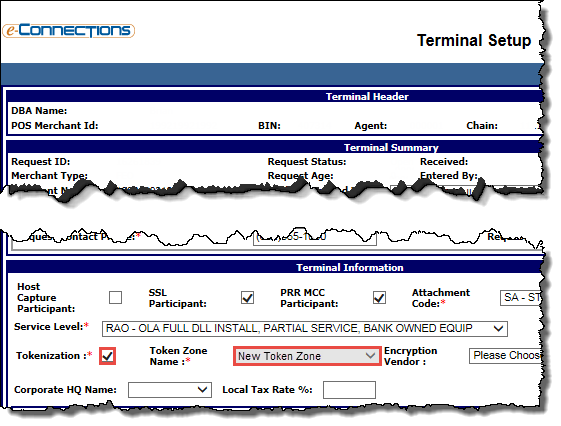
When managing a Token Zone on the Token Zone Management page, you must select the Display Flag check box for the Token Zone to appear in the Token Zone Name drop-down list on the Terminal Setup page when setting up the first terminal for a merchant, otherwise it will not appear there.
.
The Token Zone Name field populates with the first token zone in the Token Zone Name List.
The Terminal Listing lists any terminals associated with the token zone selected in the Token Zone Name List.
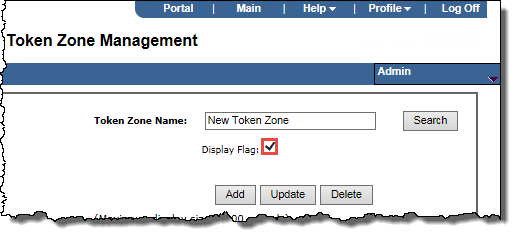
In the Token Zone Name field, delete the populated entry, and then type in the new token zone name, ensuring it complies with the Token Zone name rules.
A Token Zone name:
Must be at least four characters in length.
Can comprise alpha/numeric characters.
Cannot include any special characters (*&@#).
May contain a space within the name, but not at the beginning or end of the name.
Cannot have more than one space between two characters.
Cannot end with a D if it is 25 characters in length.
Cannot be the same as an existing Token Zone name in the same BIN.
If required, select the Display Flag for the new token zone.
When managing a Token Zone on the Token Zone Management page, you must select the Display Flag check box for the Token Zone to appear in the Token Zone Name drop-down list on the Terminal Setup page when setting up the first terminal for a merchant, otherwise it will not appear there.
.
Click Add.
A message box opens asking you to confirm the addition.
 Token Zone Management page and select the BIN for the token zone you want to add.
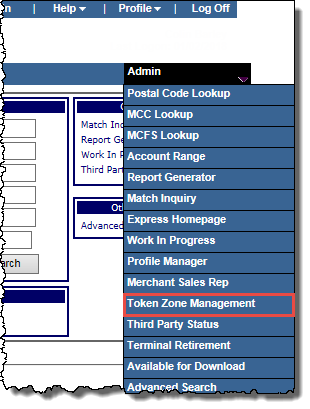
 .
.