Step 2: Terminal Details
The Terminal Details page enables you to specify additional details for the terminal.
To ensure you are on the correct page:
- If you clicked Next at the Terminal Setup page, you should see the
 Terminal Details page open.
-or-
- Find a merchant and open the Terminal Details page for a terminal that is already partially set up.
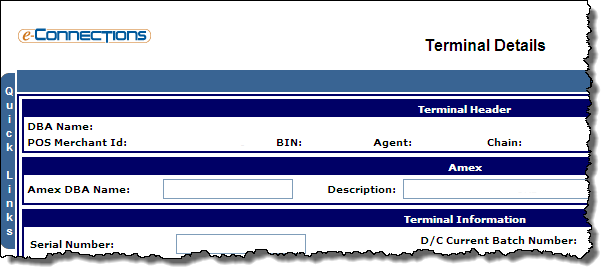
Enter or edit information in the fields on the Terminal Details page:
- In the Amex panel, if the merchant is set up to accept American Express, the Amex DBA Name and Description appear here by default; you can edit the Amex DBA Name if required.
- In the Terminal Information panel, you can review and, where appropriate, edit information in the fields.
- Serial Number: The serial number assigned to this terminal.
- Attachment Code: The Attachment Code selected for the terminal on the Terminal Setup page appears here by default.
- MIF Location Code: The Merchant Information File Location Code for the terminal appears here by default; this is an alternative identifier for a terminal within a BIN. If the BIN has been set up for MIF processing, you can click the adjacent Change MIF button to change this code.
- Idle Prompt: The text that will display on the terminal when it is not in use. The terminal will display the current date and time when this field is left blank.
- In the Printer Settings panel, you can review and, where appropriate, edit information in the fields. These printer settings control the printed output from the terminal.
- Printer Model: Ensure INTEGRATED is selected.
- Printer Type: Ensure INTEGRATED is selected.
- Print Customer Copy: The selection from the drop-down list indicates if a customer copy prints and if it prints automatically or after the user confirms they want a copy. The options are: Automatic, None, or Confirm.
- Receipt Account Number Truncation: The selection from the drop-down list (Yes or No) indicates whether or not the terminal is enabled to print the truncated account number on receipts.
- Merchant Receipt Truncation: When selected, this check box indicates that the account number will be truncated on the merchant's receipt.
- Detail Report Account Number Truncation: When this check box is selected, the Detail Report printed on the terminal will truncate the card number
- In the Auto Close Settings panel, you can review and, where appropriate, edit information in the fields.
- Auto Close: When selected, this check box enables the terminal to transmit a batch automatically at a pre-set time.
- Auto Close Time 1: The time (0000-2359) that the terminal will auto-close within a 24 hour period.
- Auto Close Attempts: The number of times that the terminal will attempt to auto close.
- Auto Close Reports: The option selected from the drop-down list indicates the type of reports that will print after a successful auto close. The available options are:
- Totals
- Srv/Clk, Totals
- Details, Srv/Clk, Totals
- Host Connection Type: Ensure S-Single is selected.
These auto close settings determine the manner and frequency with which a terminal uploads a batch of transactions into the capture system.
- In the Header / Custom Footer Lines panel, you can review and, where appropriate, edit information in the fields.
- Header Line 4/5/6: A customized message to be printed on lines four, five, and six of the transaction receipt header.
- Footer Line 1/2/3/4: A customized message to be printed on lines one, two, three, and four of the transaction receipt footer.
These header and footer line settings allow you to specify custom information that prints on receipts originating from the terminal.
- In the Dial Settings panel, you can review and, where appropriate, edit information in the fields.
- Settle Comm Type: The option selected from the drop-down list indicates whether the terminal is using a dial-up (Dial) or IP connection (Ethernet) to settle the batch.
- Auth Comm Type: The option selected from the drop-down list indicates whether the terminal is using a dial-up (Dial) or IP connection (Ethernet) to receive an authorization.
- Auto DL: When selected, this check box enables the terminal to download automatically at a pre-set time.
- In the Flags and Adjustments panel, you can review and, where appropriate, edit information in the fields.
- Market Specific Data: Ensure Hotel is selected.
- Manager Password: A customized password for any management reports.
- Beeper On: When selected, this check box configures the terminal keys to beep when pressed.
- Duplicate Trans Processing: When selected, this check box enables the terminal to check for duplicate card numbers and transaction amounts prior to authorizing the card.
- AVS Flag: When selected, this check box activates the Address Verification System flag, which enables terminal prompts for manually typed Visa card numbers only. If a manually entered Visa card number and a "Card Present" configuration setting is selected, the terminal will prompt for the ZIP code on the account. For non-Visa cards, the terminal will not prompt for a ZIP code. If a "Card Not Present" configuration is selected on a non-Visa card, the terminal reverts to a mail/phone order transaction.
- Authorization Only: When selected, this check box disables the terminal from capturing transactions in its memory. This information overrides the values entered in the Data Capture Required field on the Card Range - Setup page. This option is enabled by default if the terminal is configured to authorize transactions but not capture this information.
- In the CPS Settings panel, you can review and, where appropriate, edit information in the fields.
- Reset Ref Number To 001 Flag: When selected, this check box enables the terminal to reset transaction reference numbers after a successful transmit. When this check box is cleared, the terminal will increment reference numbers after a successful transmit.
- Purchasing Card Flag: When selected, this check box enables terminal prompts for Visa or MasterCard purchasing cards.
- In the Terminal Authentication panel, you can review and, where appropriate, edit information in the fields.
- Authentication Code
- Confirm Authentication Code
- Create Test Authentication Code (optional)
The fields in this panel enable you to set up the authentication security feature.
Note: The fields in this panel should contain at least one numeric character and one alphabetic character. Alphabetic characters must be upper case. No characters can repeat consecutively. Do not use spaces in these fields.
- In the Hotel and Lodging panel, you can review and, where appropriate, edit information in the fields.
- Calculate Check-In Amount: When selected, this check box enables the terminal to multiply the dollar amount entered in the Room Rate Amount field in this panel by the number of days in the customer's stay.
- Room Rate Amount: The entry in this field indicates the per-day rate used by the terminal to calculate the check-in amount.
- Print Check-In Amount: When selected, this check box enables the printer to print the pre-authorized amount on the check-in receipt.
- Print Checkout Receipt: When selected, this check box enables the printer to print a receipt when performing a checkout.
- Fire Safety Indicator: When selected, this check box enables the fire safety indicator.
- Click Save at any time to save the information you have entered.
-or-
Click the Next button.