Previous Topic

Next Topic

Book Contents

Book Index

Add a card range
  1. Search for the merchant to display its details on the Merchant Summary page.
  2. Verify Card Type Acceptance is available by checking to see if the T/E Account Number or MID is on the Account Summary page. If these are unavailable please see merchant maintenance for adding T/E Card Plans.
  3. In the Merchant Terminals panel, in the V Number column, click the V number to which you want to add a card range.

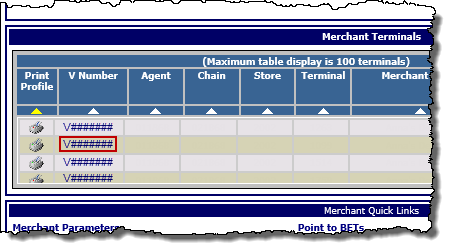
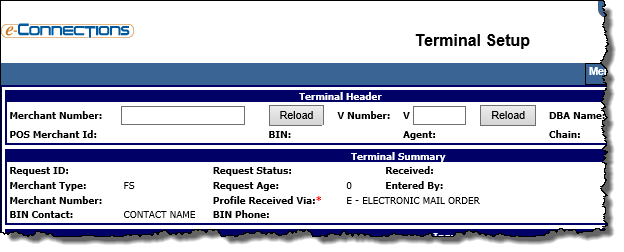
    The Terminal Setup page for that terminal opens.

  4. Click the Edit button.
  5. In the HWSW Information panel, select the Accept check box for the Card Range(s) that you want to add.

  6. In the Terminal Status panel, in the Terminal Setup Details box, enter an explanatory comment, such as Adding Discover 6011000000000000.

  7. From the Quick Links menu, click Card Range Select.

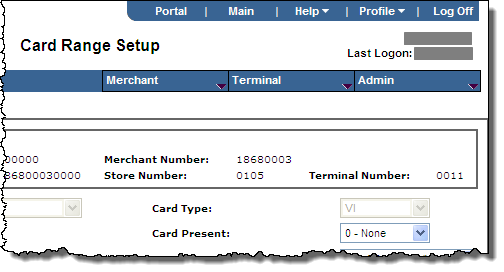
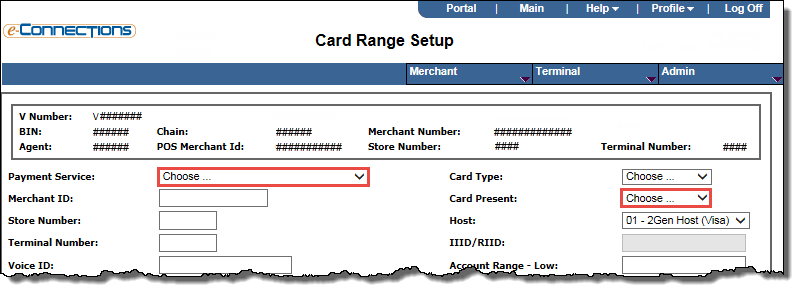
    The Card Range Setup page opens.

  8. It the card range is already listed in the Existing Card Ranges panel:
    1. In the Existing Card Ranges panel, select the option button for the appropriate Payment Service, and then click the Update button.

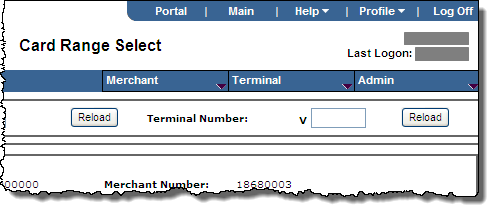
      The Card Range Select page opens.

    2. Modify values for required fields and optional fields, as needed.
    3. If the ExtendCard button.is enabled, you can click it to proceed to configure the Equinox card payment settings for the terminal.

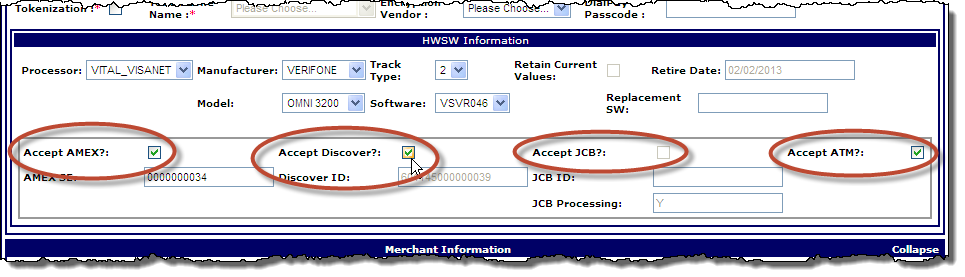
      Note: The ExtendCard button is enabled if you have selected the EQUINOX option from the Manufacturer drop-down list in the HWSH Information panel on the Terminal Setup page for this terminal.

    4. To begin processing the terminal record, click Validate.
  9. It the card range is not listed in the Existing Card Ranges panel:
    1. From the Available Card Ranges list, select the card ranges you want to add, using SHIFT+click and CTRL+click for multiple selections, and then click the Add button.

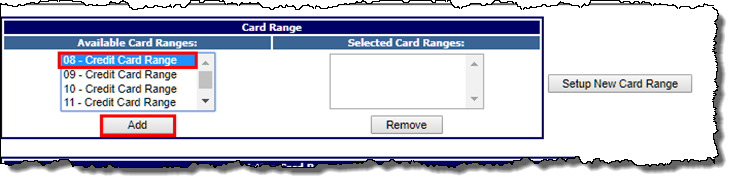
      The card ranges you selected appear in the Selected Card Ranges list.

    2. From the Selected Card Ranges list, select the first of the of the new card ranges.
    3. Click the Setup New Card Range button.

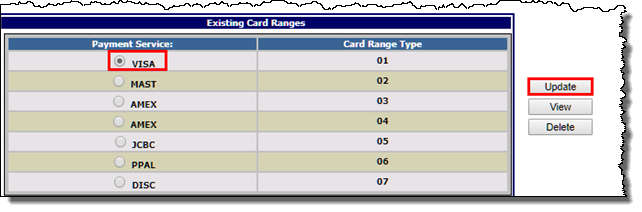
      The page refreshes with your first card range in context.

    4. Select the appropriate Payment Service for that card range.
    5. If the option is available, select the Card Present drop-down list. The recommended choice is 3 - Both.
    6. Select the appropriate check boxes for the desired Indicators.

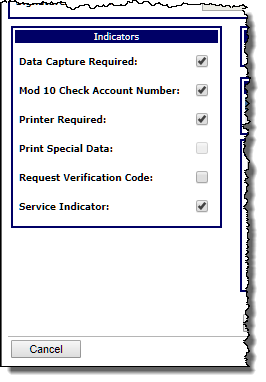
      Note: You should only select Mod 10 Check Account Number for valid credit card ranges, such as Visa, MasterCard, and American Express.

      Note: If your payment service is ATM, then you should select Printer Required and you must add sharing groups.

    7. Click the Continue button.
    8. Repeat these sub-steps for each card range being added.
    9. When that is completed, click the Next button.
    10. Add desired hosts as needed.
    11. In the Available Host scroll box, select the desired hosts.
    12. Click the Add button.
    13. Click the Setup Host button.
    14. Verify default fields are correct or change if necessary.
    15. Click the Continue button.

      Note: Stage only files do not use the host feature.

    16. Click the Next button.
    17. Click the Validate button.
    18. If the Board button is available, click Board. Otherwise, click the Validate button, then click the Board button.