Previous Topic

Next Topic

Book Contents

Book Index

Full Service Merchant
  1. In Express, search for the merchant and open the Merchant Summary page for the merchant.
  2. Perform this procedure for each terminal that is setup for the merchant:
    1. From the Terminal menu, select the terminal number, then click Terminal Setup to open the Terminal Setup page for that terminal, and then click Edit.

      terminal_setup

    2. On the HWSW Information panel, clear the Accept AMEX check box.

      accept_amex_clear

    3. From the Quick Links menu, click Card Range Select to open the Card Range Select Page.

      card_range_select

    4. On the Existing Card Ranges panel, from the Payment Service list, select one of the AMEX option buttons, and then click the Delete button.

      amex_delete

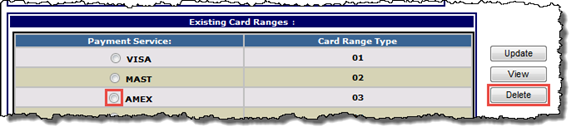
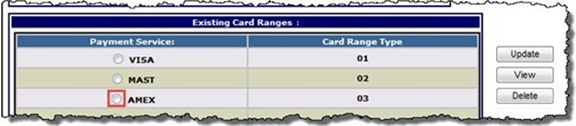
      A pop-up message opens asking you to confirm the deletion.

    5. Click OK.

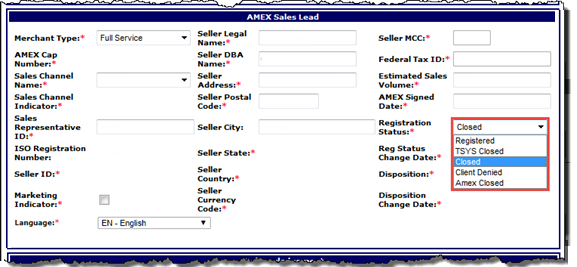
      Note: Both AMEX card ranges are linked, and are automatically deleted together.

    6. Click Board.
  3. From the Merchant menu, click Card Plans to open the Merchant Card Plans page for the merchant, and then click Edit.

    card_plans

  4. From the drop-down list in the ACH Attribute row and American Express column, select N - No Ach.

    no_ach

  5. Click Board.
  6. From the Merchant menu, click Product Setup to open the Merchant Product Setup page.

    product_setup

  7. On the AMEX panel, click the AMEX Registration button to open the AMEX Merchant Registration page, and then click Edit.

    amex_registration

  8. On the AMEX Sales Lead panel, from the Registration Status drop-down list, select Closed.

    amex_esa

  9. Click Board.
  10. From the Merchant menu, click Product Setup to open the Merchant Product Setup page, and then click Edit.

    product_setup

  11. On the AMEX panel, clear the Amex OptBlue check box.

    amex_optblue

  12. In the Account Number field, update the entry from the Amex SE number to the new ESA SE number.
  13. Click Validate.
  14. Click Board.
  15. Perform this procedure for each terminal that is setup for the merchant:
    1. From the Terminal menu, select the terminal number, then click Terminal Setup to open the Terminal Setup page for that terminal, and then click Edit.

      terminal_setup

    2. On the HWSW Information panel, select the Accept AMEX check box.

      accept_amex_select

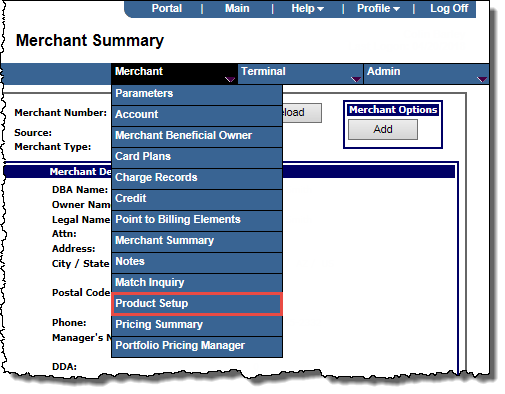
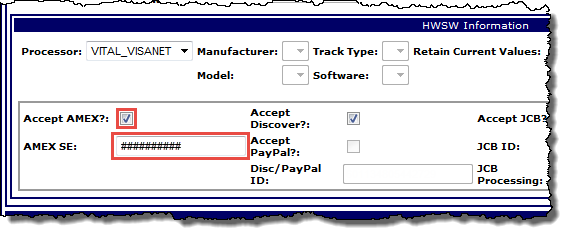
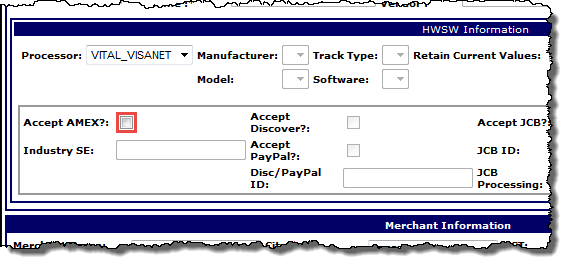
      This populates the AMEX SE field with the new SE number on each Terminal Setup page for the merchant. Verify the updated number is displayed in the field.

    3. From the Quick Links menu, click Card Range Select to open the Card Range Select page.

      card_range_select

    4. Verify the AMEX card ranges have been added to the Existing Card Ranges List.

      amex_verify

    5. Click Validate.
    6. Click Board.