![]()
![]()
![]()
![]()
|
|
|
|
|
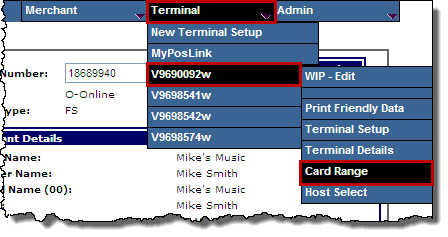
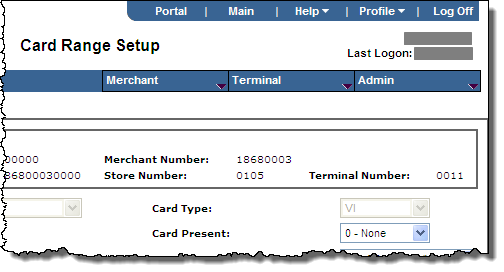
Depending on the information you selected on the HWSW Information panel of the Terminal Setup page, clicking Next at the Terminal Setup page, Terminal Details page, or Equinox Setup page opens the Card Range Select page, where you can select the card ranges for the terminal.
Alternatively, you can  open the Card Range Select page for a terminal that is already partly set up for a merchant.
-or-
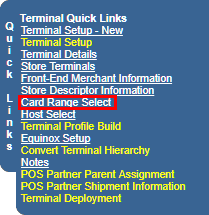
From any of the Terminal-related screens, from the Quick Links menu, click select Card Range Select.
The Card Range Select page opens.
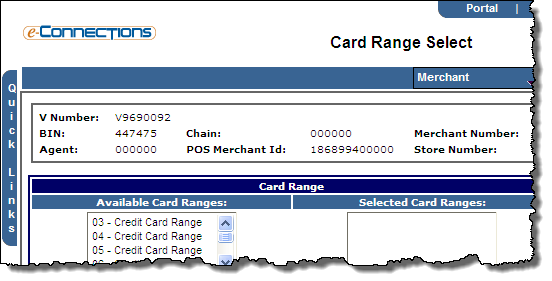
The procedure to select the card ranges for the terminal at the Card Range Select page depend on whether the card range is already listed in the Existing Card Ranges panel:
Card range already listed in the Existing Card Ranges panel
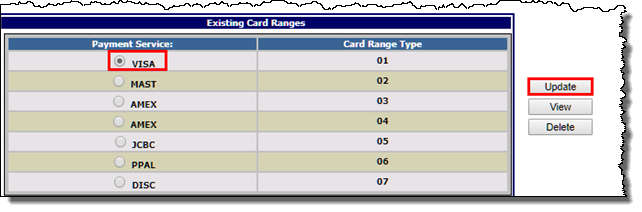
The Card Range Setup page opens.
Note: The ExtendCard button is enabled if you have selected the EQUINOX option from the Manufacturer drop-down list in the HWSH Information panel on the Terminal Setup page for this terminal.
Card range not listed in the Existing Card Ranges panel
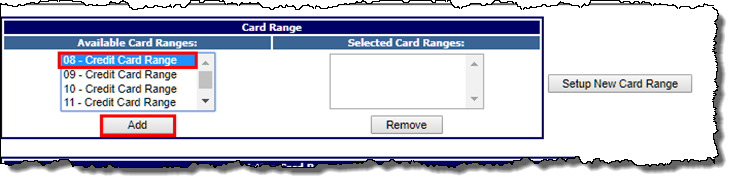
The card ranges you selected appear in the Selected Card Ranges list.
The page refreshes with your first card range in context.
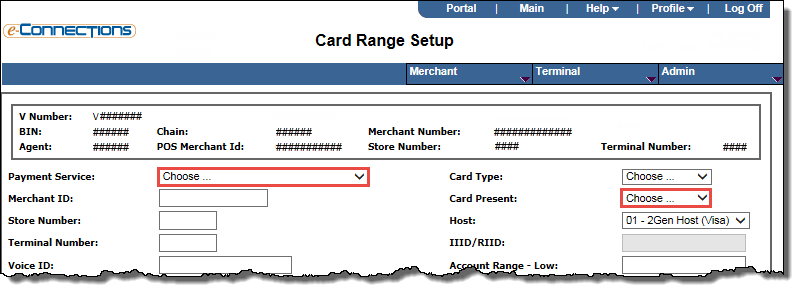
The related fields auto-populate with the appropriate data.
The recommended option is 3 - Both.
The related fields in the panel become available, which you can complete as required:
Receipt Floor LimitThe lowest transaction amount for which the terminal will print a receipt.
QPS Receipt OptionThe Quick Payment Service receipt option, which determines the circumstances under which a terminal will print a receipt for quick service transactions. These are the options available:
Auth Floor LimitThe transaction amount below which the terminal generates its own approval codes.
Signature Floor LimitThe lowest transaction amount for which the terminal will print a signature line on the receipt.
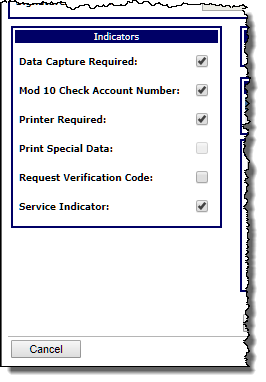
Note: You should only select Mod 10 Check Account Number for valid credit card ranges, such as Visa, MasterCard, and American Express.
Note: If your payment service is ATM, then you should select Printer Required and you must add sharing groups.
Partial Auth drop-down list, select the required option.Indicates the correct support level based on card type and merchant preference. Possible values:
Sharing Group panel, select each required group in the Available list and then click the Add button to add it to the Existing list (and if required, select a group in the Existing list and then click the Remove button to remove it).Configures the terminal to recognize the debit networks that the merchant can accept.
Note: Stage only files do not use the host feature.
Click the Next button.
-or-
Click the Validate button.
-or-
If the Board button is available, click Board. Otherwise, click the Validate button, then click the Board button.